Introduction
Replacing an iPhone battery by yourself can seem intimidating initially. Many iPhone users wonder if it’s worth attempting on their own or if it’s better left to professionals. Understanding the process, acquiring the right tools, and knowing when your battery needs replacement are crucial in making an informed decision. This guide will walk you through all the necessary steps and considerations to safely and effectively replace your iPhone battery yourself.
What is an iPhone Battery Replacement?
An iPhone battery replacement involves removing the old battery from your iPhone and installing a new one. iPhone batteries typically degrade over time, leading to shorter battery life and poorer performance. At some point, a battery replacement becomes necessary to sustain the device’s performance.
The replacement process has become more user-friendly, especially with the availability of detailed instructions and kits specifically designed for this task. However, it’s still a delicate process that requires attention to detail and a steady hand.
Signs Your iPhone Battery Needs Replacement
Recognizing when your iPhone battery needs replacement is crucial for maintaining optimal device performance. Here are some common signs:
– Your iPhone battery drains quickly even with minimal use.
– The phone shuts down unexpectedly when the battery is above 1%.
– Battery health (found in Settings) shows significantly reduced maximum capacity.
– Your iPhone becomes excessively hot during use or charging.
– There are unexpected spikes or declines in battery percentage.
Identifying these symptoms early can help prevent more serious damage to your device, ensuring longevity and performance.
Tools and Parts Needed for iPhone Battery Replacement
Before diving into the replacement process, you’ll need to gather the necessary tools and parts. Here’s what you’ll need:
Tools
- A Phillips #000 screwdriver.
- Pentalobe screwdriver (used for iPhone’s specialized screws).
- Plastic opening tools.
- Suction cup (to help open the screen).
- Tweezers.
- Spudger (a small, flat tool for prying and poking).
Parts
- A replacement battery specific to your iPhone model.
- Adhesive strips to secure the new battery.
- iPhone screen protectors and cleaning materials.
Having these tools and parts at hand will make the replacement process smoother and help you avoid unnecessary interruptions.

Step-by-Step Guide to Replacing Your iPhone Battery
Here is a detailed guide to replacing your iPhone battery:
1. Power Off Your iPhone: Hold down the power button and swipe the slider to turn off your device.
2. Remove the Pentalobe Screws: Use the pentalobe screwdriver to remove the two screws next to the lightning port.
3. Lift the Screen: Use the suction cup to carefully lift the screen from the base of the device. Insert a plastic opening tool to gently separate the display assembly.
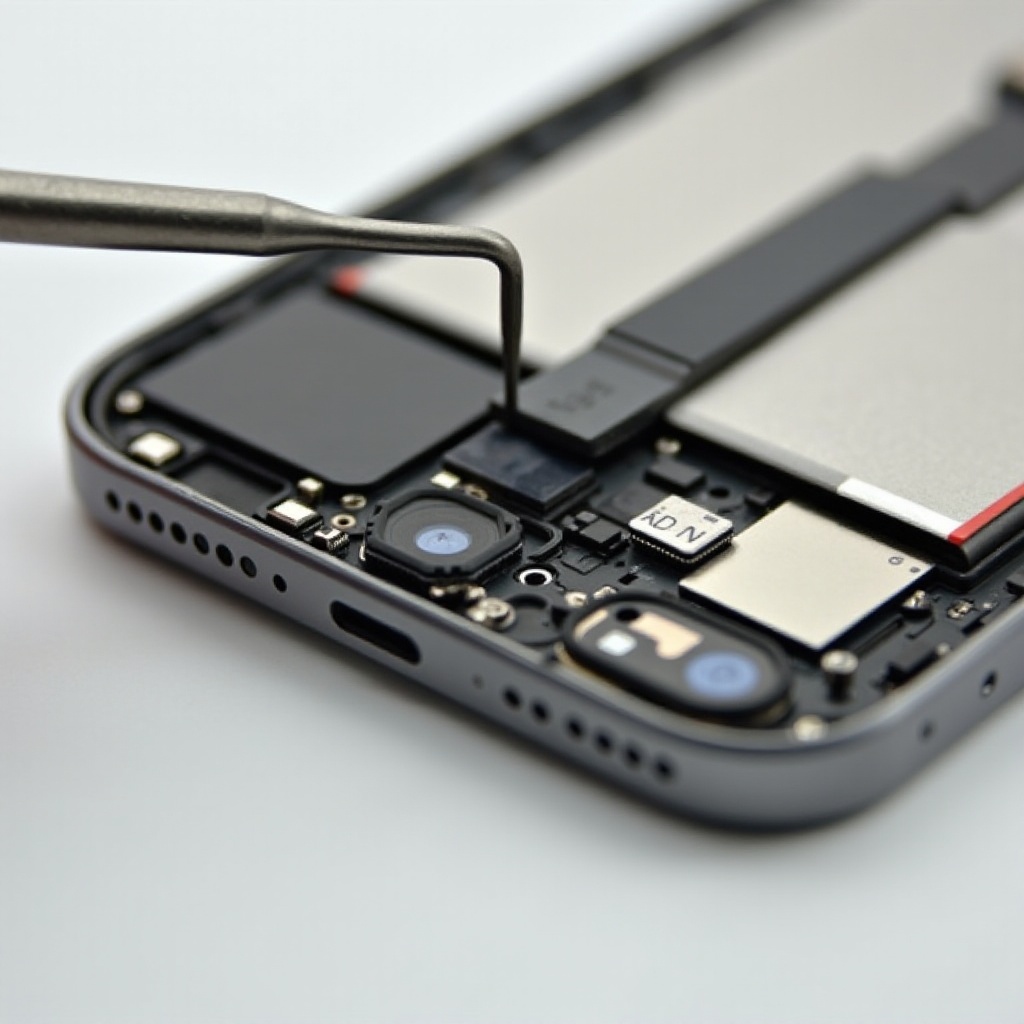
4. Disconnect Battery Connectors: Use the Phillips #000 screwdriver to remove the screws securing the battery connector bracket. Then, use the spudger to disconnect the battery connector.
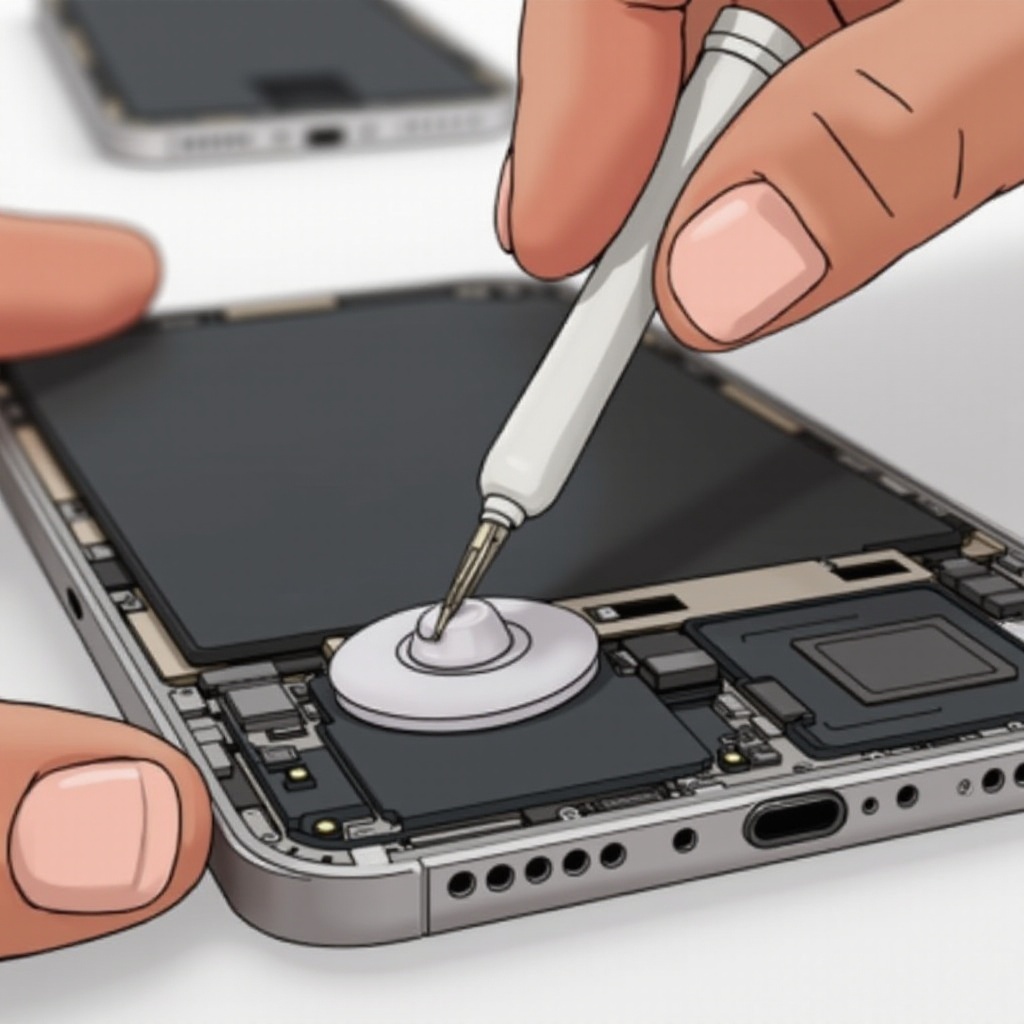
5. Remove Adhesive Strips: Gently pull out the adhesive strips holding the battery in place. If they break, use a hairdryer to soften the adhesive and carefully pry out the battery.
6. Insert the New Battery: After removing the old battery, place the new one in the same position. Secure it with new adhesive strips.
7. Reconnect the Battery Connector: Reattach the battery connector and the bracket, securing them with the Phillips screws.
8. Reassemble the iPhone: Carefully place the display assembly back into its slot, and press gently until it clicks back into place.
9. Power On Your iPhone: Turn on your iPhone to ensure it is functioning correctly and the new battery is properly installed.
Common Issues and Troubleshooting
Despite your careful approach, you may encounter some common issues during battery replacement:
– Device Doesn’t Power On: Recheck the battery connection to ensure it is securely attached.
– Screen Doesn’t Sit Flush: Ensure no cables are pinched or improperly placed.
– Battery Drains Quickly: Perform a software update or factory reset after battery replacement.
Addressing these minor hiccups promptly can help in achieving successful battery replacement.
Pros and Cons of DIY iPhone Battery Replacement
Replacing an iPhone battery yourself has both advantages and disadvantages.
Pros
- Cost-Efficient: DIY replacement can save money on high service fees.
- Convenience: Immediate fix without waiting for appointment slots.
- Learning Experience: Gain technical skills and knowledge about your device.
Cons
- Risk of Damage: There’s a potential risk of damaging internal components.
- Time-Consuming: The process can be time-intensive and requires patience.
- Warranty Issues: Self-service may void any remaining warranty on your device.
Weighing these pros and cons is essential to decide if a DIY battery replacement is the best course of action for you.
Conclusion
Replacing your iPhone battery yourself is entirely possible with the right tools and knowledge. By following this comprehensive guide, you can enjoy extended battery life and save on repair costs. Always consider the potential risks and benefits, and proceed with caution if you decide to take on this DIY project.
Frequently Asked Questions
Is it safe to replace an iPhone battery yourself?
Yes, it can be safe if you follow the step-by-step instructions carefully and have the appropriate tools. However, there is always a risk of damaging the internal components, which you should be prepared for.
How long does it take to replace an iPhone battery?
The process usually takes about 30 minutes to an hour, depending on your familiarity with the device and the tools.
Will replacing my own iPhone battery void the warranty?
Yes, self-replacing an iPhone battery can void any warranty you have on the device. It’s essential to consider this before attempting a DIY replacement.